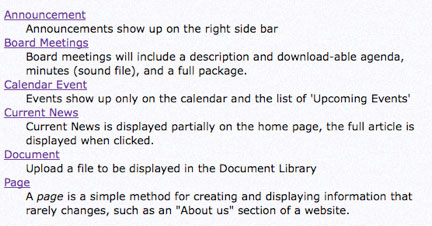
On the admin menu, you will see a link that says “Create Content”. This is a good starting point to get information onto your website. Most sites will be composed simply of Pages. Other content types organize and separate content by where the content is to be displayed on the site. Click on which ever content type you are trying to create to be taken to the “Content Creation Form”.
The “Content Creation Form” is composed of all the settings necessary for the system to display the information you are trying to create. Fill out all form items and click save. Remember, you can always come back and edit content once it’s been create.
* Required items are displayed with red (*)
Simple pages only have a title, the information body, a menu, and a URL. Other more complex content types may have a Taxonomy category, Workflow options, Additional Files or Images.
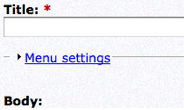
The Body of this form is the actual page that will be displayed. The system will display a minimal HTML editor. Instructions on using this HTML editor are detailed below. Advanced users may choose to use other HTML editors; this HTML editor is there for easy use HTML editing.
Menu Item
When creating new content, it is often a good idea to add the content to a menu link so visitors will be able to access this new page. “Menu Settings” will automatically add the new content to the menu of your choose across the whole site.
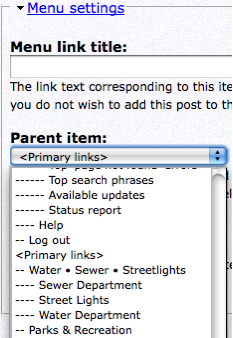
Give your new content a Menu Title and then select the menu and Parent in the drop down menu to place the link onto the new menu. Separate Menu’s are displayed as <Primary Links>.
Menu Items can be “nested” under other menu links, which means the child menu item will be accessible after clicking on the parent menu item. (This is very important when managing drop down menus). The parent Menu item is displayed with “--“ (two -) while the children items are displayed with “----“ (four -).
To add a menu item under a parent, select the parent menu item (two -) in the “Parent Item” dropdown (ex. The parent in this example would be “Water – Sewer – Streetlights” and “Sewer Department” would be a “nested” child.) More on this in the Menu section.
URL
Every page created will need a unique URL for the visitors to access the page. For most systems the URL is automatically generated based off the title of the page. However, the user can set the URL manually. Uncheck the “Automatic alias” and fill in the URL for this page. Enter only the end part of the URL without the beginning or ending slashes “/”. The page will be accessible by http://yoursitehere.com/URL