When editing content, the system will display a mini-HTML editor for the body of the content. The mini-editor is a low-end featured HTML editor that is similar Dreamweaver or Word for easier creation of HTML pages.
Creating HTML
* Warning: Copy and Pasting from Word Documents or other web pages will copy the hidden HTML elements that you don’t see. This will affect the way the webpage is displayed (often un-wanted text or odd formatting). Be careful when copying and pasting!
* Advanced HTML users may wish to view the HTML code. Click “Source” to switch the display between the rendered version and the HTML code.

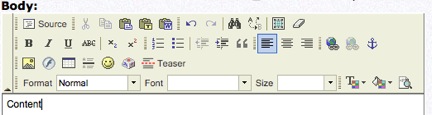
The icons in the top bar are elements that can be applied to text or that allow adding of pictures or links. The text can be made larger or smaller, bold, italic or underlined and colored. The icons are fairly easy to understand and represent what they will do, but there are a couple multi-step icons that will be described in further detail.
Formatting

To make an organized web page, a table should be used. Tables are made up of rows and columns to separate content.

When creating tables, adjust the number of rows, and columns as well as the width (typically it is best to change the width to 100 percent). For most tables, I like to remove the border (set to 0). The cell padding and spacing adjust how far apart the information will be displayed from information in other cells.
Insert Images

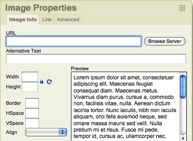
To insert an image, first place the cursor ( | ) where you want the image to be inserted. Once you click on the “Insert/Edit Image” icon a new window will popup with the “Image Properties”. All images will need to have a URL, steps for this below. The border, HSpace and VSpace (distance from other objects) and alignment are optional.
We have added a “Browse Server” button to make it easy to upload and locate pictures that are on the web server. Once you click this button, a new window will pop up with a “File Browser”. The file browser will show all the files that have been uploaded to the web server that can be placed into your content. All images must be on the web server.
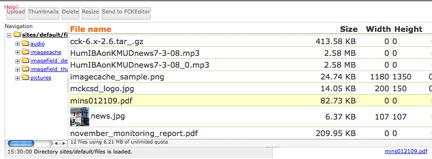
Images and other files will have to be uploaded to the remote web server to be accessible by the web. To upload a file, in the upper left hand corner, click the first button labeled “Upload”. This will drop down a text file with a “Browse” and “Upload” Button.

First click “Browse” and locate on your local machine the file or image you wish to place on the web site. Select the file and click OK, then click the “upload” button to upload the file. If the image you are upload is a large image, select a “Create Thumbnail” option to have the system automatically resize the image to a “web safe” size.
You will now see the file you just selected uploaded on the “remote file list” below. The file you just uploaded should be selected. Selected items will be highlighted in tan.
With the image you wish to add to the page you are creating highlighted, next click the “Send to FCKeditor” button that the top right.
This will take you back to the “Image Properties” window and fill in the URL. Adjust any additional options you wish to change and click “OK” to insert the image.
Insert Links

Links are created to get from one page to another or to download documents or files. A link can be either an internal link to another page on our site, or an external site to some other web site. To create a link, select the text or image that you with to create into a link and click the “insert/edit link” icon. This will open the “Link” window.

All links will need to have a URL. When creating an external link, leave the protocol as “Http://” and fill in the “www” address of the site you are linking into the URL. Click Ok and you will see the text become highlighted in blue. When using external links, it’s often a good idea to change the “Target” (tab at the top) to “New Window (_blank)”.
To create an internal link to another section of our own site, we first need to get the URL of the page we want to link. In another browser window go to the page on your site that you wish to link. You will notice the URL as http://yoursitehere.com/page/mypage.
To create an internal link, you will want to copy the “/page/mypage”. This will be your URL for the link. Copy and past this back into the URL of “Link” window. The protocol should automatically change to “<other>”. Click OK and you should notice the text highlight in blue.
SAVE!
When you are finished editing a page of content and you are satisfied with your changes, remember to SAVE. At the bottom of the content edit form, make sure you click Save or Preview the page before clicking away from this page or else changes will be lost.